Saturday, February 28, 2015

Victorian Frame Stand Ups and Brand New Finnabair‏


Happy weekend everyone! I'm absolutely IN LOVE with our new goodies this week. Gorgeous Victorian Frame Stand Ups, stunning new collage sheets, AND the Finnabair line is in stock and ready to ship. All of these goodies will go beautifully together!
You can check it out HERE.


My favorite thing about the Victorian Frame Stand Ups is that they can be used for just about any holiday or theme! The idea came to me when I was packing orders and a Victorian Frame Ornament was sitting on a Butterfly Stick. And that was that! I just had to design some!

And how can you resist the yummy goodies below! I can't wait to dive in!


Art Time!

I had a blast playing with one of the new Victorian Frame Stand Ups. A few days ago while shopping I saw a gorgeous mixed media vintage bird painting, which was the inspiration for my piece. I adore the blues and yellows together. 


I would love to do a whole series with different birds! And of course the new Bird Collage Sheet I used would be perfect!


I started by "painting" my raw masonite pieces with Inka Gold. I learned a great tip while doing this. Using my sponge brush and adding a bit of water now and then, the Inka Gold went on smooth as butter! Often I use my finger to apply, and find the Inka Gold can flake off at times. The sponge brush/water method worked amazingly! It was SO FAST! And don't forget to store your Inka with a baby wipe to keep it moist!


I added black acrylic paint and Gold Stickles to my Bee Cut Out. Cute little guy! I'm calling my piece "Birds and the Bees".


I positioned my frame on my Collage Sheet and drew a very thin line around the center.


I cut out my Collage Image leaving a small border, and then glued the image to the back of the frame. Once dry, I attached the entire thing to my oval back. And then attached everything to the round base.


I finished my piece with some White Sharpie dots and three small crystals on the crown. This piece was super fast and only took 20 minutes from start to finish including photographs. My new Inka Gold application had a lot to do with the speed. I love the way it came out! 


Inspiration By Amy Nieman!


A super sweet trinket box by Design Team Member Amy Nieman using Collage Sheet DP322! The perfect place for storing your tiny treasures! So cool Amy!
)She also used our Washi Tapes, Black Scalloped Dresden Trim, Paper Mache Box, Word Paper Cuts)


Inspiration By Lynn Stevens!


A sweet as can be tiny house assemblage by Design Team Member Lynn Stevens! Love the Tiny Houses with the Tiny Angel! So clever Lynn!
(She Also Used Our Tiny Fairy Head Paper Cuts, Collage Sheet CV85, Collage sheet CV58, Collage sheet CV34, German Dresden Borders, Silver Faux Rhinestone Ribbon (for door knobs), Pink Glass Glitter)


Inspiration By Gerri Herbst!


I'm loving this super creative ATC by Design Team Member Gerri Herbst! The tiny eggs in the chipboard nest are just too much! In the best possible way. Amazing composition Gerri!
(She Also Used Our Bird ATC Frame, Vintage Belles Collage Sheet)


Inspiration By Diana Darden!


Trying to beckon Spring with this adorable Stand Up Fairy Bloom by Diana Darden! This may give you some inspiration for the new Victorian Frame Stand Ups! So sweet Diana!
(She Also Used Our Fairy Head Paper Cuts, Diamond Glaze, Inka Gold)


Congratulations to Linda Cain!


A huge congratulations to Design Team Member Linda Cain! She has several of her art pieces published in the current issue of Just Steampunk Magazine (Vol. 6 on the newsstands now)! And because I knew you would ask, here are the links to her Design Team projects featured. Each one is even more fabulous! Way to go Linda!

Steampunk Manikin: http://ow.ly/JF9RQ
Steampunk Heart: http://ow.ly/JF9Wz
Steampunk Hutch: http://ow.ly/JF9Yq

Saturday, February 21, 2015

Brand New Doll Kits + Tons of Tim Holtz‏


Happy weekend everyone! I'm so excited about our new goodies this week. FABULOUS new Doll Kits with a wonderful vintage and Steampunk twist and tons of the brand new 2015 Tim Holtz goodies in stock and ready to ship! And it's all on SALE so grab it while you can!
You can check it out HERE.


Art Time with Cat Kerr!

My heart skipped a little beat when I saw this stunning assemblage piece by Design Team Member Cat Kerr! I love how she creatively combined our Heart Shrine Kit and Stand Up Steampunk Cameo Woman to create this amazing (and large) piece!

Cat has a full tutorial for you HERE on her blog with tons of photos and step-outs. She has the entire supply list linked as well. Amazing Cat!


Inspiration By Amy Nieman!

 "I'm sticking with you cuz I'm made out of glue!" A gorgeous journal page Design Team Member Amy Nieman! I adore her lettering and of course the yummy Gelato colors! So gorgeous Amy!
(She Also Used Our Tiny Heart Stencil, Arrow Stencil, Brass Arrow Charm, Heart Washi Tape)


Inspiration By Tina Walker!

This absolutely stunning Santos Doll is by Tina Walker! All of the assemblage bits are wonderful and very fitting for this week's release! Her molded center piece is amazing too. So creative and inspiring Tina!


Inspiration By Lisa Rupp!

And last but definitely not least, an incredible 3D Santos Cage Doll by Lisa Rupp! Notice the "floating" gears inside the cage? My favorite part! And the amazing finish on the wings? So gorgeous Lisa!

Now I'm definitely in the mood to play with the newest Doll Kits!

Saturday, February 14, 2015

Gorgeous Butterfly Box Shrine Kits and Finnabair‏


Happy weekend everyone! I'm still pushing for Spring over here, and the new Butterfly Shrines are definitely getting me in the mood. I had the idea to design one, and ended up with SIX! You'll want them all! We also have Paper Flowers galore and new Finnabair goodies! Such great stuff!
You can check it out HERE.
In addition to the New Goodies, be sure to check out our HUGE general Easter and Spring section filled with 100s of great goodies! And yep, I put them ALL on sale!


Art Time!


I was excited to play with one of the Butterfly Shrine Kits! It was so hard to pick which one to start with, but the purples and blues were calling to me. I love this color combination!


I started by using Verday paints on my assembled box and stand. First a base-coat of gold.


Verday paints can be used in many different ways, with many different combinations. I used all three remaining colors, blobbing them on sporadically. This part is messy, but fun!


As my paints were drying, great colors were emerging!


On a whim, I decided to add some purple glitter paint to the mix!


I added some details to my clay face and butterfly with acrylic paint and Stickles. My clay face was left over from my Primitive Angels which you can read about here.


I wanted to fill my shrine with Krinkled Shred, which is a super fun embellishment! I liberally brushed some Mod Podge (my Glue N Seal ran out) around the inside of my shrine. Then I filled it with the shred, pressing it against the edges a bit.


I attached my clay face to a scrap square of Chipboard, and then covered the chip with the Krinkle Shred. Once dry, I glued the bottom of the chip to the bottom of my shrine. It blended right in!


Finally I attached some gorgeous Mini Paper Blooms! Of course the purple glitter I added to the outside is much prettier in person. It came out a bit dark in the photo. I really loved this project! Something a bit different!


Inspiration By Amy Nieman!


How adorable is this Cupid Stick by Design Team Member Amy Nieman? He or she definitely has my heart. So sweet Amy!

(She Also Used Our Brass Key Charm and Silver Faux Rhinestone Ribbon)


Inspiration By Linda Cain!

This absolutely stunning Valentine Angel is by Design Team Member Linda Cain. Notice how she used several of the brand new (just listed) Finnabair stamps on the Masonite? What a perfect match! I especially love the stamping on the wings! Hop on over to Linda's blog post for the complete supply list and more info! Just fabulous


Inspiration By Gerri Herbst!


I'm loving this Cupid Ornament by Design Team Member Gerri Herbst! The wood grain stamping is just fantastic! Not to mention the distressed heart! Beautiful Gerri!

(She Also Used Our Large Masonite Heart Ornament, Retro Grunge Heart Paper Cuts, Valentine Word Paper Cuts)


Inspiration By Lynn Stevens!

And last but definitely not least, a stunning Valentine's Day card from Design Team Member Lynn Stevens! The Heart Paper Cut in the center is the perfect touch! Just lovely Lynn! You are indeed the queen of romantic art!


Happy Valentine's Day everyone! This lovely Valentine postcard arrived for me yesterday by the talented Lynn Britton Radford! So sweet!
I hope you get to do something you love tomorrow! Maybe that includes making some art!
Happy Creating! xoxo

Saturday, February 7, 2015

Bring on Spring Goodies‏


Happy weekend everyone! I don't know about you, but I'm SO READY for Spring! It's been on my mind for the past few weeks, so I designed several goodies to get us all in the mood. Not that I need to twist your arm or anything! Bring on the green grass and sunshine!
You can check it out HERE.
In addition to the New Goodies, be sure to check out our HUGE general Easter and Spring section filled with 100s of great goodies! And yep, I put them ALL on sale!


Art Time!


I couldn't wait to play with one of the Large Masonite Feathers. I knew exactly what I wanted to do. This is such a fun project and requires very few supplies. Just the Masonite Feather and some acrylic paint and pens!


After I was finished I began thinking about other things I could have added. Words (stamped, written, paper cuts), fabric bits for some of the sections, paper bits for some of the sections, pearl pens, Stickles, Bling, etc. etc. Another project with endless possibilities!


The feathers I designed and my finished sample were inspired by this awesome tribal feather painting I saw! I went a bit less tribal and more Zentangle, but I love both!


First I panted my feather with white acrylic paint. You could also use Gesso.


Next I drew the center "vein" and sections with my black paint pen.


I picked acrylic paint colors that were bright and happy. Sort of peacock with a bit of pink mixed in for fun!


Next I painted some of my sections. I left a few white for some Zentangle fun! Don't worry if you paint over your black lines a bit. You can go back over them at the end. I did!


Once my paint was dry, I filled in some details with my pens. I used my Sharpies for thicker lines and my Signos for detailed lines. Both worked beautifully right over the acrylic paint.


Finally, I added a few more details over my painted sections. I love the way this bright happy feather turned out. Mine has an ornament hole. You can either add a wire for hanging OR hang it directly on the wall using a small nail in the hole. I really like that idea!


This piece reminded me of my Zentangle Manikin from almost exactly two years ago!


Inspiration By Amy Nieman!

I just love these adorable Masonite Heart Magnets by Design Team Member Amy Nieman! The arrows are so fun, and the retro look is perfect! Just super Amy!
(She Also Used Our Valentine Word Paper Cuts)


Inspiration By Linda Cain!

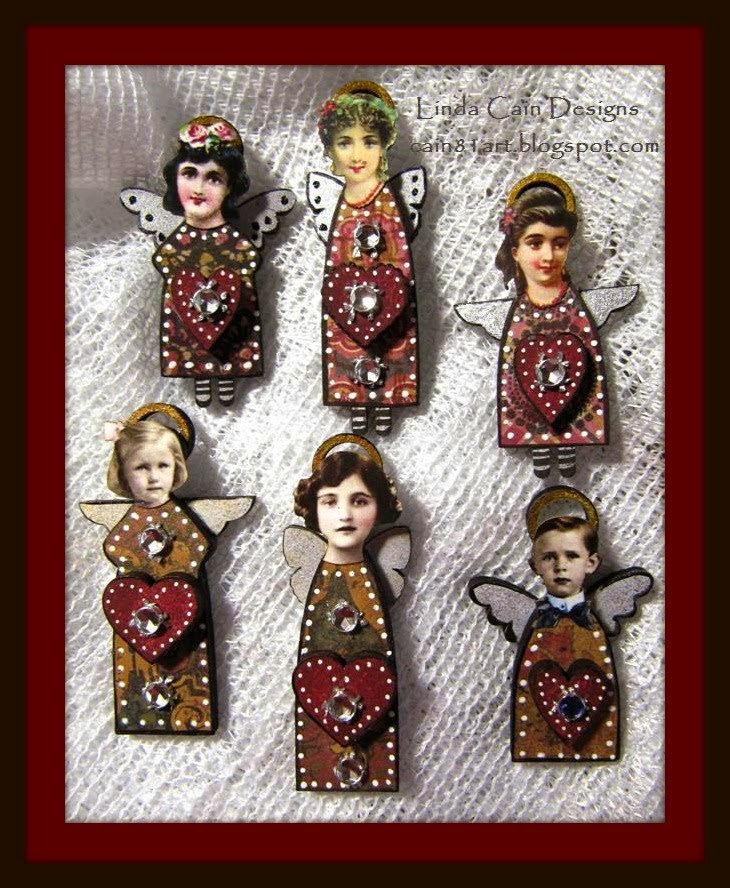
We must be shooting for cuteness overload today! And these Mini Valentine Angels by Design Team Member Linda Cain are no exception. Love how they are each "holding" a tiny heart! Hop on over to Linda's blog post for the complete supply list and more info! Just wonderful


Inspiration By Gerri Herbst!

I'm loving this pretty tag by Design Team Member Gerri Herbst with a spectacular Spring flair! The Tall Little Houses are adorned so sweetly! Adorable Gerri!
(She Also Used Our Valentine Word Paper Cuts)


Inspiration By Cat Kerr!

How stunning is this House Pendant by Design Team Member Cat Kerr. Cat created the metal bezel from scratch! Beautiful Cat!
(She Also Used Our Collage Word Paper Cuts and Santos Head Paper Cuts)


Oh, and I have to share this cool bag that arrived this week. It features original art by Cat Kerr (from her first Design Team project), and it's the perfect size to hold pens, markers, and brushes! You can find them in Cat's Zazzle Shop. I couldn't resist treating myself to one. Beautiful and functional!


The weather man says it's going to be 50 degress and sunny tomorrow! I'm so excited! Last week I brightened up the art studio bathroom with these vintage milk glass vases and faux gerbera daisies! Who else is ready for Spring?