Saturday, December 31, 2011

Retro Cafe Art Gallery Valentine's Day CONTEST!


In celebration of one of our most favorite holidays, we are having a Valentine's Day Contest! We love art, and we love our customers so it's the perfect combination! Find the details below and feel free to share the love and post the button above.


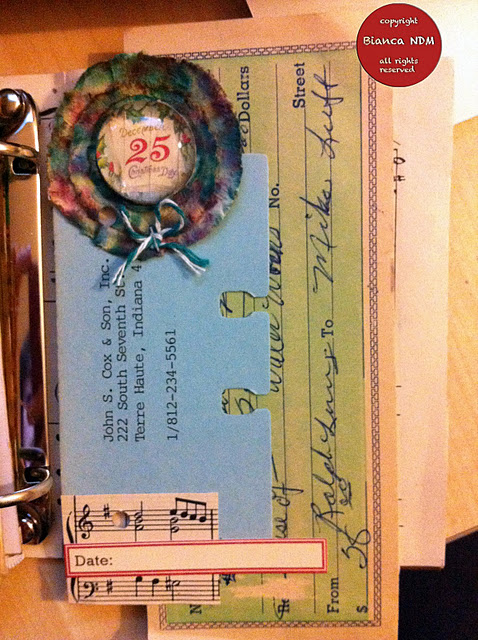
We have tons of Valentine's Day Goodies in the shop to inspire you including these adorable "candy" hearts! Of course you are not limited to these supplies. Entries must contain at least one item we carry in the shop, however you are not required to purchase the items from us. As long as we carry it, your art qualifies!

The Rules:

1. Submit up to 3 pieces of Valentine's Day art you have created! Each piece of art must include at least one item carried by Retro Cafe Art Gallery! You don't even have to buy it from us, as long as we currently carry it you're qualified. Of course each piece can have more than 1 product, but at least 1 is required. You can have 1, 2 or 3 entries. All mediums are welcome!

2. Email your photos to retrocafeart@gmail.com subject: Valentine's Day Contest. Please send a separate photo for each entry (just 1 image per entry - and yes you can make a photo collage). Files between 200 -300 KB preferred. I will post these photos on our Facebook page in this album as they are received. Please include your full name in your email and the Retro Cafe Art Gallery product(s) used. We only need photos, not the actual art! You will immediately receive your FREE Valentine's Day Digital Collage Sheet via email after we receive your first entry. You can even use it for your 2nd and 3rd entries.

3. Deadline to enter is Tuesday February 14th. Winners will be announced on the 15th.

4. We love our International customers and you are always welcome to play!


The Prizes:

1. There will be two, $50.00 Retro Cafe Art Gallery Gift Certificates awarded using a random number generator. In addition two 5 packs of Digital Collage Sheets will be awarded to two random winners. What are you waiting for? Get those entries in early so we can all be inspired!

2. ALL entrants will receive a special Valentine's Day Digital Collage Sheet just for playing, so everyone WINS! The sheet will be emailed to you immediately after submitting your first entry. And yes, the sheet can be used for your other entries.

3. Feel free to share the love by posting about this contest on your blog, Facebook, website, etc. You are welcome to use the Retro Cafe Art Gallery button at the top of the page. Good luck and let's have some fun! xo

Tuesday, December 27, 2011

Day of the Dead Cameo Pin Tutorial


Time to make an awesome cameo pin! I went with a Day of the Dead inspired theme, however you can modify this tutorial to your heart's desire!
.....................................................................

You only need a few supplies including a Medium Masonite Oval Cameo Frame (Front and Back Combo), 40x30mm Crystal Clear Acrylic Cabochon, Diamond Glaze, Skeleton ATC Collage Sheet (or any other collage image), Inca Gold Gilders PastePin Back, E6000, and Silver Stickles. To begin I sized my Collage Sheet on the computer and cropped out a 40x30mm oval. Or you can just use an image that is larger than your Crystal Clear Cabochon.
....................................................................

You can use your image as is or play with it a bit. I added a bit of acrylic paint, some graphite accents, and then a bit of Silver Stickles. Once you are happy with your image, you can attach your Cabochon. I find it's easier to add the Cabochon to a larger image and then cut around it after it's dry rather than cutting it out before attaching. Apply a generous coat of Diamond Glaze to the flat side of your Cabochon and then place it over your image, pressing down to release any air bubbles or excess glaze. I know I've used just the right amount when some squishes out the sides. Allow the Diamond Glaze to dry. I normally wait about 20 minutes.
.....................................................................

Once the Diamond Glaze is dry, cut around the Cabochon.
.....................................................................

Gilders Paste works great on any of our Masonite pieces. For my Cameo Frames I rubbed Inca Gold Gilders Paste on the front of the front piece and the back of the back piece.
.....................................................................

I also added some patterned tissue paper to the back just for fun, attaching with Diamond Glaze.
.....................................................................

Next, glue together your front and back frames, and then glue in your cameo. I used Mod Podge. If desired, add some glitter accents using Stickles (the BEST glitter glue out there!).
.....................................................................

Once everything is dry, attach a pin back using a strong adhesive such as E6000.
.....................................................................

And there you have it! Super easy and it can be modified in so many ways. Supplies Recap: Medium Masonite Oval Cameo Frame (Front and Back Combo), 40x30mm Crystal Clear Acrylic Cabochon, Diamond Glaze, Skeleton ATC Collage Sheet (or any other collage image), Inca Gold Gilders Paste, Pin Back, E6000, and Silver Stickles.

Wednesday, December 21, 2011

Happy Holidays!


 Happy holidays everyone! Our fabulous Design Team has been busy as usual creating some fantastic art samples. First I have a few Halloween images to share, which I'm sure you won't mind. I know for some of you it's Halloween year round! This wonderfully eerie journal spread was created by Bianca Mandity. Bianca used the Skull Stencil and had it created in a larger 7" x 7" size. You can have any smaller stencil made larger for you if it's not already offered right here. She also used the Small Gradone Stencil and the super cool newer Eye Stencil.


For the above page Bianca created several image transfers using the Steampunk Parts Collage Sheet and Skeleton ATC Collage Sheet. She also used the Wings Stencil, Small Onomotoholes Stencil, and the Spider Web ATC Overlay in the center.


In an earlier post I started to share some of Bianca's Christmas journal pages. Here are a few more! She colored the embossed deer using Varitone Ink! I just love how it came out.


For the wreath above and the center of the flower below, she attached a 25mm Crystal Clear Acrylic Cabochon to images from the Christmas Squares Collage Sheet. She also added a Journal Ticket to the page below.


And look how sweet this page with the Hello Deer Stencil is. She used the doe and added German Dresden Gold Antlers.


And here is Bianca's fantastic cover which includes several Retro Cafe Art Gallery goodies including a 2" Masointie Window, Adage Ticket, Fancy Scalloped Gold German Dresden, Christmas Muse Token, and a Christmas Squares Collage Sheet image. Awesome pieces Bianca!


Next we have some festive holiday creations from Jennifer Ingle! For the ornament above, Jennifer cleverly used the inside piece of Fancy ATC Frame Style 3 as the base for her ornament. The background is from the Vintage Grunge and Words Collage Sheet and she adorned it with several goodies including a 1" Chipboard Window, Christmas Muse Token, Red Fancy Scalloped German Dresden, and Gold German Dresden Antlers. Very creative!


Jennifer also created this fabulous holiday shrine. She used the ATC Shelf Shrine as the base. She also used some White Mica Flakes for the snow and bits of Antique Gold Medieval German Dresden Border.


What I love most about this piece is how she used the Hello Deer Stencil. First she used the actual stencil to create the shadow (look closely) and then she attached the inside cut-outs that come with the stencil! And a bit of Stickles (which we now carry - yay!) for sparkle! I can almost hear the crunch of the snow under the deer's feet! Love!


Next up we have several lovely samples from Gerri Herbst! For the tag above, Gerri incorporated several images from the Christmas Tags DP91 Collage Sheet. I love how she cut them out for a different effect and wrapped the whole thing up with Mini Christmas Tree Light Garland!


The piece above shows a clever way to use the Holes ATC Frame (one of my favorite frames!) and who doesn't love Steampunk!


Gerri made this sweet ATC using the 8 Pane Rounded ATC Frame. The image inside is from the Christmas Collage Sheet DP90.


And a Cheery Red Tag also using images from Christmas Collage Sheet DP90.


And look how cute Lucy looks! Gerri created the 3-D effect using the inside piece from the Fancy ATC Frame Style 4.


This elegant tag by Gerri features images from the Assorted Christmas Collage Sheet. Just love all of the golds!


Gerri is always so great at finding other uses for things. In the sample above she used a Gothic Arch Shrine on the front of a Christmas card! Sweet!


The next few samples by Gerri show several ways to use the Hello Deer Stencil. I love seeing some many different variations. The possibilities really are endless!


Now that was a lot of fabulous samples! But wait, we're not quite done...


We also have a few new Tutorials. You can see how Bianca created hand carved stamps using our stencils HERE.


And a fabulous ATC Gothic Arch Ornament Tutorial by Gerri HERE.

I wish you and yours a wonderful holiday season! From the bottom of my heart a huge thank you to each and every one of you for helping to make Retro Cafe Art Gallery a success! Lots more to come in 2012! P.S. we will be open through the holidays and will continue our usual shipping schedule. xoxo Kristin


Sunday, December 18, 2011

Christmas Cake Giveaway Winner!


Today is the day to announce the winner of our latest giveaway co-hosted with Denise! A huge thanks go Denise for her wonderful, inspirational projects! More to come I'm sure!


And the winner is #17, Narah-Kimberly! Please email us at retrocafeart@gmail.com to claim your Gift Certificate!

Don't forget to like our Facebook page. We have a random giveaway every Wednesday in addition everything else! During the holidays it will be business as usual at Retro Cafe Art Gallery so feel free to place your orders!

Wednesday, December 14, 2011

Earring Tree Tutorial


Time to make an 'earring tree' :).
.....................................................................

To make this sweet tree that can also double as an earring holder for gift giving all you need is a Large Fancy Stand-Up Tree With Holes (the Small Trees would also work and have the same size holes or try a Traditional Tree), multi-color metallic eyelets (or any other standard 1/8" eyelets), Mod Podge or a similar adhesive, a Masonite Gear, Extra Long Art Brad, and some acrylic paint. For the earrings you will need Small XOXO Charms with one charm hole, jump rings, and some simple ear wires.
.....................................................................

I began by painting my tree using acrylic paint and a sponge brush. I dabbed/blotted it on to create some texture. You could also create some texture using the end of a paint brush or a scrunched up paper towel. I painted both sides and the base. Allow to dry fully.
.....................................................................

Look at that awesome texture!
.....................................................................

The eyelets aren't long enough to set, however gluing them looks just as nice and is much easier. I used Mod Podge to glue in my metallic eyelets. Use a pin or toothpick to add some Mod Podge to one of the holes and then drop in the eyelet. Repeat for all of the holes.
.....................................................................

The metallic eyelets remind me of the vintage mercury ornaments! Next glue the tree to the base. I used Mod Podge, but just about any glue will work.
.....................................................................

For my 'star', I used a Masonite Gear colored with Inca Gold Gilders Paste. You can also paint them with acrylic paint. I wanted the gear to spin (yay!) so I attached it through the top eyelet using an Extra Long Art Brad.
.....................................................................

Open up the brad on the back and snip down the ends using wire cutters.
.....................................................................

The earrings are super easy. Simply paint some Small XOXO Charms using you choice of acrylic paint. Attach 2 jump rings (so they will face the right way) and some fish hook ear wires and you're set. Hang them on your tree and you have a lovely gift for yourself or someone special. If you prefer post earrings you can make the earrings using the Small XOXO Charms without holes and our Earring Post Blanks. After painting your charms attach them to the posts using E6000.
.....................................................................

So there you have it! Earring holders can be a piece of art too! You just need a few supplies: Large Fancy Stand-Up Tree With Holes (the Small Trees would also work and have the same size holes or try a Traditional Tree), multi-color metallic eyelets (or any other standard 1/8" eyelets), Mod Podge or a similar adhesive, a Masonite Gear, Extra Long Art Brad, and some acrylic paint. For the earrings you will need Small XOXO Charms with one charm hole, jump rings, and some simple ear wires.

Sunday, December 11, 2011

Bird Bracelet Tutorial


This is what we will be making!
 .....................................................................

To create this fantastic bird bracelet you only need a few supplies. 8 pieces of 18x13mm Masonite Ovals with Two Holes Vertical, 1 Pack of 7mm jump rings, A Silver Lobster Claw Clasp, Collage Sheet Images (I used DP87, DP88, and DP113), Mod Podge or a similar adhesive, Inca Gold Gilders Paste, and fine grit sandpaper.
 .....................................................................

Begin by placing your oval over your image (I shrunk mine down before printing) and trace around it with a pencil. Cut it out and glue it to the oval using Mod Podge. It doesn't have to be cut perfectly as we will fine tune in the next step.
 .....................................................................

This next part is really important. Use a piece of fine grit sandpaper and sand around the edges of your oval to remove any excess paper. I find that sanding in a downward motion works best. Don't sand back and forth, just downward toward your image. This leaves a perfect edge and it's really easy!
 .....................................................................


After attaching your image to one side, create your hole by piercing the paper from the back side using a needle, safely pin, or an awl. I used a large sewing needle that I had on hand.
 .....................................................................


Flip it over and enlarge your hole from the front if needed.
 .....................................................................


Repeat for all 8 pieces and then also add images to the back if you would like your bracelet to be reversible. You can always leave the back plain if you would like. Either let the natural masonite show, paint, or add Gilders Paste to the back. I added images to both sides.
 .....................................................................


To age my pieces I first added some white acrylic paint over some of my images using my finger. Just to make them a bit more hazy. Then I added Inca Gold Gilders Paste paste around the edges. I love how this turned out.
 .....................................................................


Using 7mm jump rings or larger, attach your ovals together, adding 2 ovals per jump ring.
 .....................................................................

Add 2 extra jump rings to one side and then attach your clasp to the last ring. On the other side add several jump rings. I added 9 extra rings. This allows the wearer to adjust the length, which is especailly nice if you're not sure of the wrist size. If desired you can seal your images with Diamond Glaze (before connecting your ovals) or a light spray of Krylon Acrylic Sealer. I gave mine a light spray on both sides after it was all connected.
 .....................................................................

I just love that you can make these reversible!
 .....................................................................

The bracelet is also very lightweight.
 .....................................................................

And done! You can see how I packaged my bracelet here using recycled materials. All you need to create one for yourself is 8 pieces of 18x13mm Masonite Ovals with Two Holes Vertical, 1 Pack of 7mm jump rings, A Silver Lobster Claw Clasp, Collage Sheet Images (I used DP87, DP88, and DP113), Mod Podge or a similar adhesive, Inca Gold Gilders Paste, and fine grit sandpaper. Make one for yourself or to give as a gift!