Hi everyone! I'm going to walk you through how to make the gorgeous shrine above using our new Clear Acrylic Arch Shelf Shrine. Of course you could also use the Pointed or Rounded Shrine. I'm calling this my Antique Mirror Relic Shrine because that's exactly what it ends up looking like!
(Note: All of the supplies used are linked at the bottom.)
I started with a piece of scrapbooking paper for my background and gathered my Collage Sheets. I'm using Full of Grace, Collage Words, and Collage Borders. Of course you can use what you would like. And have your Acrylic Shrine ready.
Roughly trace around the shrine. This will be the area you collage. I found it easier to cut out my pieces after I finished the collage. This way I could be more messy!
Using Mod Podge I attached images from all three collage sheets above. I added a bit of stamping and doodling. Of course you could stop here and simply cut out your pieces and attach them to your shrine. But I wanted a more aged, antique look.
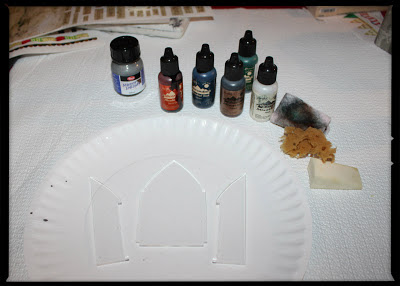
Remove the protective paper from both sides of your shrine pieces. Once you have a corner started, it easily peels right off and the pieces are ready to go. No prep needed.
Next I added some of the new Viva Mirror Paint around the edges. At this point you will be working on the back of the pieces so everything shows through the front. I added the paint using a sponge. What happened next was very unexpected, but I loved the result. Because I got some paint on the edges, some cracks started to form. This really gave the pieces an authentic cracked mirror look! Using my fingernail, I also scraped off some of the paint to further the aged look. Don't use anything too sharp or rough as it might scratch the acrylic. Unless you want that look! A finger nail was perfect.
The mirror paint really does reflect and looks like real mirror, though it's difficult to photograph. The "red" areas in this photo show the light reflecting off the "mirrored" areas.
Working from the back again, I also added some alcohol inks to the pieces. You can use any colors you choose. I wanted to mimic a rusty look, so I used Terra Cotta mixed with some Copper and Pearl Mixative.
Using your shrine pieces again as a template, cut out your collage. First trace the entire thing like you did earlier and cut it out in one piece. Then use each side piece as a template to cut out the sides. Trace first, then cut.
Cut out a piece of Incredi-sheet that is larger than the collage piece. Peel off the adhesive backing from one side of the Incredi-sheet and then lay your collage piece on top (face down) pressing firmly.
Cut off the excess Incredi-sheet. You basically now have a sticker. Remove the second layer of adhesive backing from the Incredi-sheet and press your collage image face down on the back of your acrylic piece, right on top of your mirror paint etc. Take care to line it up before pressing down since the strong tape is not repositionable. If needed, trim around your acrylic piece with scissors or an xacto knife.
Burnish with a bone folder and repeat for the shrine side panels. If you don't want to use double sided adhesive, you could also secure the pieces to the acrylic using Diamond Glaze, Glossy Accents, or any clear drying adhesive meant for clear substrates. I love the Incredi-sheets because they are super permanent and not at all messy!
If you are like me, you may want the back to look pretty too. I spray painted mine with silver spray paint and then stamped an image.
Finally, attach the sides with a bit of glue at the desired angle. I used a dab of E6000 at each end and just to be sure it was nice and secure, I also ran a line of Diamond Glaze along the seam in the back.
And there you have it!
Again, the mirror doesn't photograph perfectly, but you can really see the reflection in the above photo. It's bouncing nicely off the "ground".
The acrylic is extremely fun to play with and allows you to use several cool techniques. Keep in mind you can also just attach your collage to the front and back like you would a piece of Chipboard or Masonite if you prefer that look! The sky's the limit!


Wonderful mirrored effects! Thanks for sharing.
ReplyDeleteThanks for sharing this kind of things in the post. Nice tutorial you have provide, everyone would like it.
ReplyDeleteThanks for taking the time to do the step-by-step. That mirror paint is fantastic.
ReplyDeleteGreat job! Your tutorial rocks!
ReplyDelete~Linda