Wednesday, May 23, 2012

Washi Tape Eiffel Tower ATC Holder Tutorial


I couldn't wait to play with our new Paris inspired goodies and thought I would share what I came up with! These super cute ATC holders and Paris inspired ATCs!
..........................................................................

To make the ATC holders, I started with the large Eiffel Tower Stand-Ups.
..........................................................................

First, I sprayed the front and back of both pieces with white spray paint. I knew I wanted to cover the whole thing with Washi Tape, which shows up best over a white background. Spray paint works great on the Masonite pieces and is super fast!
..........................................................................

Next, I covered the tower using vertical strips of Washi Tape. Any color would work, however I thought the Black with White Dots would be super cute!
..........................................................................

I quickly covered the piece, just tearing off the tape with my fingers (I love that it tears so easily!). Make sure to cover the entire piece.
..........................................................................

Using some small scissors (or an xacto knife), cut around the tower.
..........................................................................

Use sand paper to file down any spots that you missed.
..........................................................................

The small open areas would have been difficult to cut around, so I cut out the whole area, and filled in the white areas with black acrylic paint.
..........................................................................

Once the paint was dry and the piece was sealed it blended right in!
..........................................................................

Cover your base in the same manner. You can push in the open areas using the tip of your finger and then cut them away using an xacto knife.
..........................................................................

You can cover both sides using Washi Tape if you would like, just repeat the steps above. Instead, I decided to stamp the other side. Simply stamp with a permanent ink. I used Ranger Archival Ink.
..........................................................................

I sealed the taped side using Mod Podge and a sponge brush.
..........................................................................

To finish the piece pop the tower into the base using a little bit of glue to secure. I also added a sweet Pink Baker's Twine bow!
..........................................................................

I love the back just as much!
..........................................................................

For the second tower I used a 2 step spray crackle. I love spray crackle as it always seems to come out just right and it's extremely easy to use! Simply follow the instructions on the can. And of course spray the tower and base separately, and attach once dry.
..........................................................................

And voila! Attach your favorite ATCs using clothes pins!
..........................................................................

One tower can hold up to 3 ATCs (though I only have 2 pictured). Cute!
..........................................................................

To make my clothes pins extra cute, I inked up my stamp and then pushed them down onto the stamp. This made it easier to see how I was lining up! You could also color the pins further with Distress Markers, Copic Markers, acrylic paint, and more.
..........................................................................

And of course I had to make some ATCs for my holder!
 ..........................................................................

For the bases, I used my favorite Black Mat Board ATC Bases. They are the perfect thickness and weight, plus I like having the nice black back.
 ..........................................................................

For my first ATC I started by attaching an image from Collage Sheet DP253 using some Incredi-sheet. I added some white acrylic paint and then aged the edges using brown ink and a Color Duster. Next, I attached a few strips of Washi Tape (Black and White Dots and Red with White Hearts). The burst was created using one of the stencils from the Small Psychedelic ATC Set and embossing powder. I placed my stencil and then inked it up using a Color Duster. Then I poured on some embossing powder, tapped off the excess, and finally heated. I love the way it turned out! Finally I added some Inca Gold Gilders Paste using my finger to one of our Masonite Eiffel Tower Cut-Outs and attached using Mod Podge. Look how perfectly the middle heart shows through the tower! And totally by accident!
 ..........................................................................

For this ATC, I attached strips that I tore off from Collage Sheet DP253 and Collage Sheet DP113 and added a bit of acrylic paint using my finger and black ink around the edges. I embossed the Small Paris Skyline Stencil on the bottom, and then added a touch of German Dresden. The bottom is a piece cut from the Gold Baroque Border and the frame is from the Gold Cameo Frame Set. Finally I attached a Masonite Fleur-de-lis Cut-Out. I thought it looked great without any color, so I left it natural.
..........................................................................

For this final ATC, I started by attaching a vintage book page using Incredi-sheet. I added a generous amount of acrylic paint, and a beautiful Marie images from Collage Sheet DP196. On the bottom I added a bit of Gold Baroque Border German Dresden. And finally I added Inca Gold Gilders Paste to one of the small Eiffel Towers in the Eiffel Tower Mix Cut-Out Set. The tiny ones are SO cute! I just love them!
 ..........................................................................

I love the backs of the Black Mat Board ATC Bases! Ideally I would have loved to sign them with a white or silver gel pen, but I didn't have one so I settled for a yellow colored pencil.
 ..........................................................................

I hope you enjoyed this tutorial! The Eiffel Tower Stand-Up ATC holders would make a great gift! And of course they can hold photos as well!
..........................................................................

On a side note, remember this fabulous Ornate Theatre Shrine? How about lighting it? I purchased a battery powered votive candle, and attached it to the ceiling using velcro. The Red Curtain hides it perfectly!
..........................................................................

Lights, camera, action! Now I just need to fill my theatre with a fabulous scene! xoxo

Friday, May 18, 2012

Brand New Coffee Break Design Shrine Kits, Paris Inspired Goodies, and More!


Bonjour friends! As many of you know, a few weeks ago I took a trip to Las Vegas. While I love all of the fabulous hotels, the Paris Hotel is by far my favorite. It's especially lovely when it back drops the Bellagio Water Show! I've also been lucky enough to see Paris France, and our trip to Vegas brought back many lovely memories! Speaking of Vegas, I hope you are all planning on playing along in the "Vegas Baby" Art Challenge. Check out the rules and current entries here. They are all so amazing! Keep em' coming!


Seeing the Paris Hotel again, completely inspired me, so I was on a mission to create some awesome Paris inspired goodies. You can see them all HERE. First up, some Stand-Ups! You can also get them without stands to use in your collage and altered art.


I love the Arc de Triomphes! How adorable would it be to have an image peeking through the arc!


And if you love charms and jewelry like I do (speaking of, I have a jewelry/art show I'm vending in tomorrow!) then you will love the Mix Sets. We've got Eiffel Towers, Arc de Triomphes, and Fleurs-de-lis! Also available as individual charms in specific sizes! With our without charm holes of course. Sweet! The Eiffel Towers without charm holes look so cool on ATCs! I plan to play with some really soon (after said art show).


With the different sizes you can easily make earrings, necklaces, pins, and so much more! Can't wait to play with these too.


Some of the Arcs are Inchie size. Yay!


Here is a photo I took of the actual Arc in Paris, France. Too bad that guy's head got in the way! LOL. I didn't realize it at the time, and it's the only one I took :).


 And of course I had to add to our large collection of Clear Acrylic Charms. In addition to our old favorites, we now have Eiffel Tower, Arc de Triomphe, and Fleur-de-lis clear acrylic charms. And you get a bunch in each set!


Ah, and onto the first new Shrine Kit! As soon as I created the ATC Door Shrine Kits a few months ago, I knew I wanted one smaller, much smaller, as small as I could go. I love mini :). So I give you the Mini Parisian Door Shrine Kit! It's not even two inches, yet the door still opens/closes and it has gorgeous detailing including a Fleur header. Plus the top has two holes where you can simply loop your chain through to create a necklace. Or just cover up the holes to make a pin, standing shrine, etc. It's even cuter and smaller in person. Note, I have pretty small hands, so it looks larger than it is in the photo.


 This is just calling for a Tiny Frozen Charlotte inside!


 Another photo I took of the real thing :). To be honest, it seemed smaller in person that I had expected. Still beautiful though! And I hope to go back.


 And here is a picture of me and my best friend Kim making new friends! She happened to be studying abroad at the time, so I was able to stay with her during my nice long visit. Definitely one of my top vacations!


Paris Skyline Stencil anyone? Yep, definitely my new favorite Coffee Break Design Stencil. Available in small and large. The small with be perfect for ATCs.


And for an encore, I saved the best for last! Does anything say Paris better than a gorgeous French Theatre? I think not, so I give you the Ornate Theatre Shrine Kit. It's big, one of our top four largest shrines, and it's awesome.


I also created a coordinating Stage Curtain Collage Sheet that fits the Shrine perfectly. And it's available in six different colors!


Here is the start to a Theatre Shrine I'm working on. So far I've spray painted some of the pieces red and attached the Red Curtain Collage Sheet. Spray paint works great on the pieces, especially for larger Shrines like this one. Simply spray them before assembling while the pieces are still flat. Easy! And just for fun I placed some Eiffel Tower Stand-Ups (Small and Large) in the photo to show you how cute they would be with the Theatre. Several of our other Stand-Ups would look great too. Circus Muscle Man perhaps? This Kit has so many possibilities. You could use actual fabric for the curtains, attach some gorgeous German Dresden, create a Frozen Charlotte Doll scene inside, go with a traditional paper theatre scene, and so much more. I would love to hear any other ideas you might have too!

I still have some more ideas for other Paris Inspired Goodies, but I'll stop here for now :). I hope you enjoy the fun new supplies. Check them all out HERE.

Au revoir for now! xo

Monday, May 7, 2012

BRAND NEW Washi Tape, Masking Stickers, Baker's Twine, and More!


I'm beyond excited to tell you about some of the fabulous NEW goodies in the shop! First, WASHI TAPE! Yes, I'm addicted to the stuff, and you can thank Bianca Mandity for that. You know she does the most awesome journal spreads, Washi Tape being one of her staples. So, yes, we now have Washi Tape. AND LOTS of it. Over 65 different patterns with the great prices you've come to expect from us!

 
And how about some yummy Baker's Twine! Great for gift packaging of course, but also awesome on cards, journal spreads, and yes, even ATCs! (see below!)


Our new goodies are all so yummy that I couldn't wait to play. So I made this sweet ATC! I started with one of our 1/16" Chipboard ATC bases and quickly painted it white with acrylic paint. I added a few strips of Washi Tape toward the bottom and then layered a dollie from the Hello Dollie Bodies Collage Sheet over the tape. The cute dress is from our Doll Dresses Collage Sheet! At the top I drew a "string" using a fine black Sharpie and then cut out little flags using several different Washi Tapes. The banner was so much FUN to make and the possibilites are endless. I didn't use a template, I just cut the flags eyeballing them to make them relatively the same size. Best of all the flags took just a tiny piece of tape! Finally I wrapped some Purple Baker's Twine around the card and tied a bow. Super easy, super sweet. Washi Tape and Baker's Twine is GREAT for collage and altered art too.


And how about some ultra fun Masking Stickers?


Just like Washi Tape, the stickers are awesome for journaling, collage, gift packaging, cards, and so much more! The above stickers are from the Ver. Pastel Sticker Set.


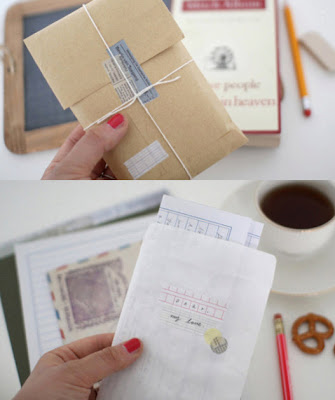
With Washi Tape and Baker's Twine your packages will never be boring! The above stickers are from the Ver. Paper Sticker Set.


Eeeekkkk... how about making a super sweet 3-D garland banner? I love using the tape to make flat banners like I did on my ATC (would also be awesome on a journal spread) or make one to hang! This banner was created with the Ver. Basic Sticker Set and Baker's Twine, however you can also use any of the Washi Tapes too! Simply cut a piece of Washi Tape twice as long as your desired flag, fold the tape over the twine, sticking the two adhesive sides together, and then cut your flag shape! You could do triangles, "show ribbon ends", or even rectangles looks adorable. I'll bet you can think of even more too. You can check out all the NEW goodies Here! Some of the tapes have limited stock so better grab them up while you can! xo