

In this tutorial we will be making a Mini Journal Necklace as shown above. You can order the supplies separately on the site or you can order a Mini Journal Necklace Kit.
................................................

We will begin with a Brass Treasure Box, 9 1" Rounded Square Stencil Board Pages, Silver Ball Chain, and Open Balls.
...............................................

Begin by punching 2 holes in the top of the box using a metal hole punch. If you purchase the Kit, the holes will already be punched for you.
................................................

Remove the connector from your Ball Chain and thread one end of ball chain through the hole in the top of your box (go in from the top/outside) and add an Open Ball to the end. Position the open ball over the last ball on your chain and squeeze shut using jewelry pliers. Repeat for the other side. If you are leaving your necklace 30" long, no need to use the ball chain connector as it can fit over the head. If you want a shorter chain, simply cut to size and use the connector in the middle of the chain to secure.
................................................
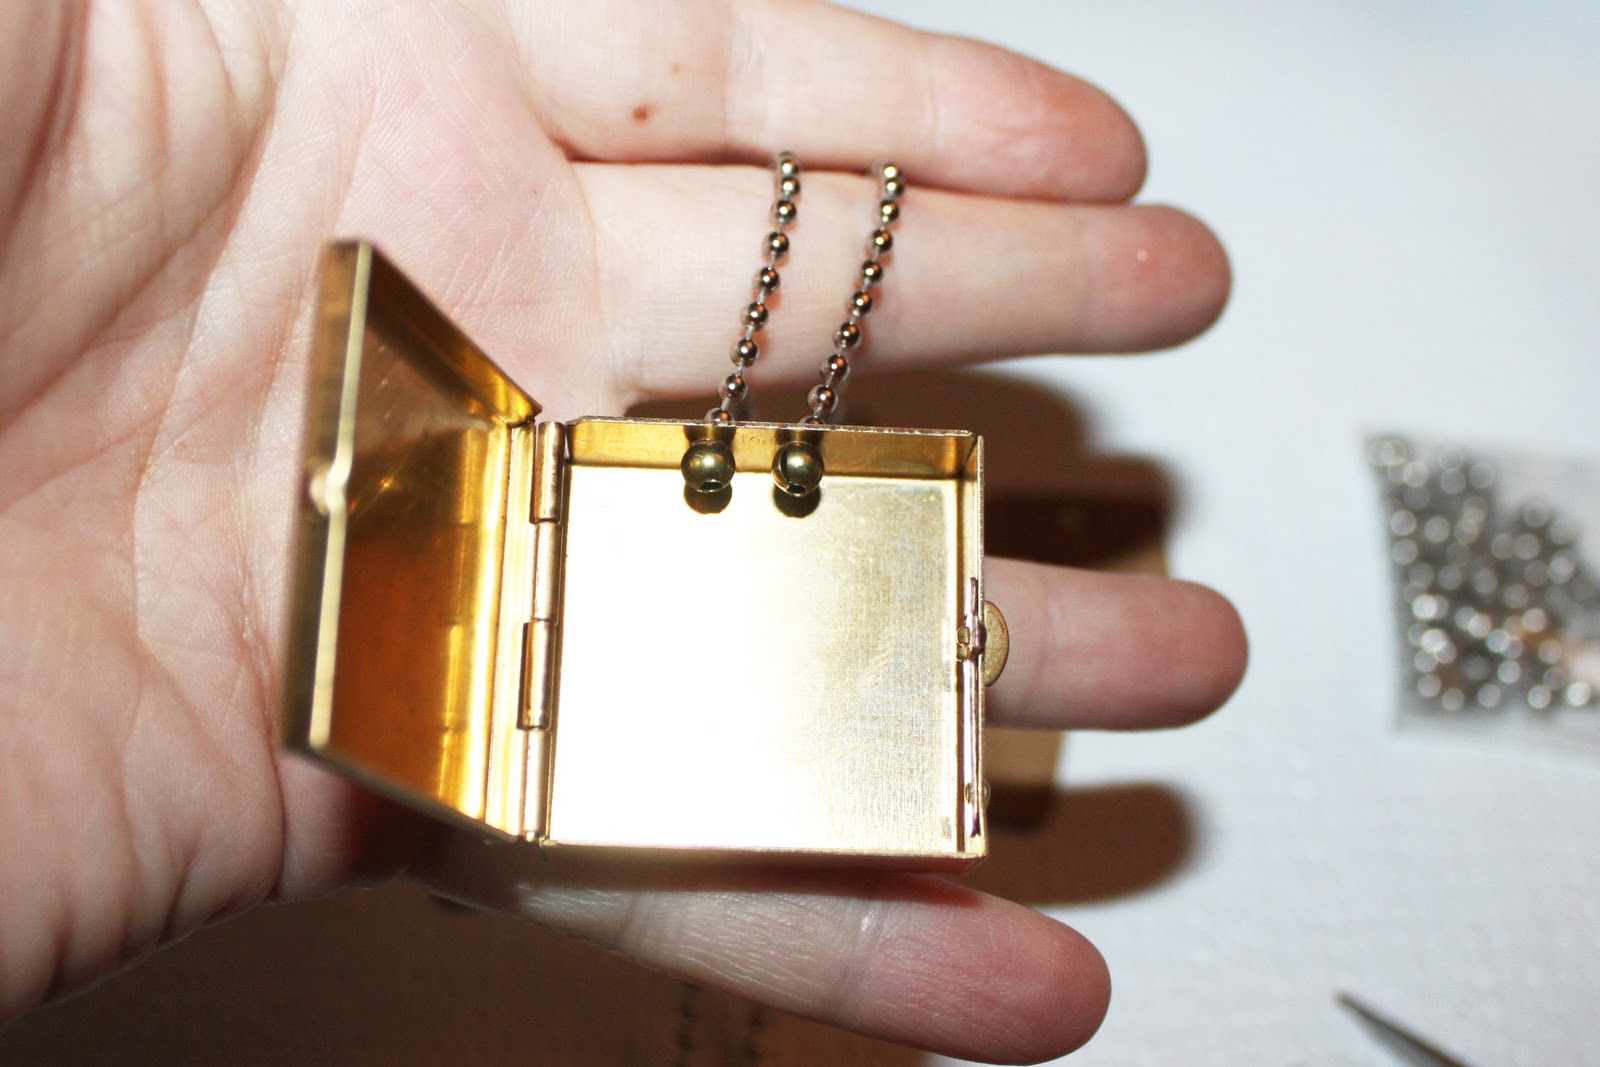
The Open Balls will keep the chain in place.
................................................

Add an Open Ball to the chain on the outside of the box as well so your chain does not fall down inside your box. I used brass Open Balls on the inside and silver on the outside. The Kit comes with both finishes.
.................................................

Stack your 9 journal pages and then place a Long Brass Eyelet through the hole. Place your Brass Eyelet Washer smooth side up over the eyelet stem and then set your eyelet with a 1/8" Eyelet Setter . Remember to set your eyelet on a hard surface. I use a steel block. Don't pound too hard as you want your pages to move freely. You don't want a super tight setting. Alternatively, you can simply attach your pages using a 7mm Jump Ring.
.................................................

The pages can now rotate open (or flip up if you use a jump ring).
.................................................

Next, using my finger I added some patina with Black Gilders Paste. I tore some images from the laser printed DP113 Collage Sheet and attached them using Diamond Glaze again using my finger. Add a thin layer of Diamond Glaze on the top of your image to seal as well. I think tearing the images makes them look more aged. Add more Black Gilders Paste as desired.
.................................................

On the back I added more Black Gilders Paste and attached some printed tissue (any Tissue Tape works great) using more Diamond Glaze (top and bottom). The Diamond Glaze makes the tape translucent so only the print shows.
.................................................
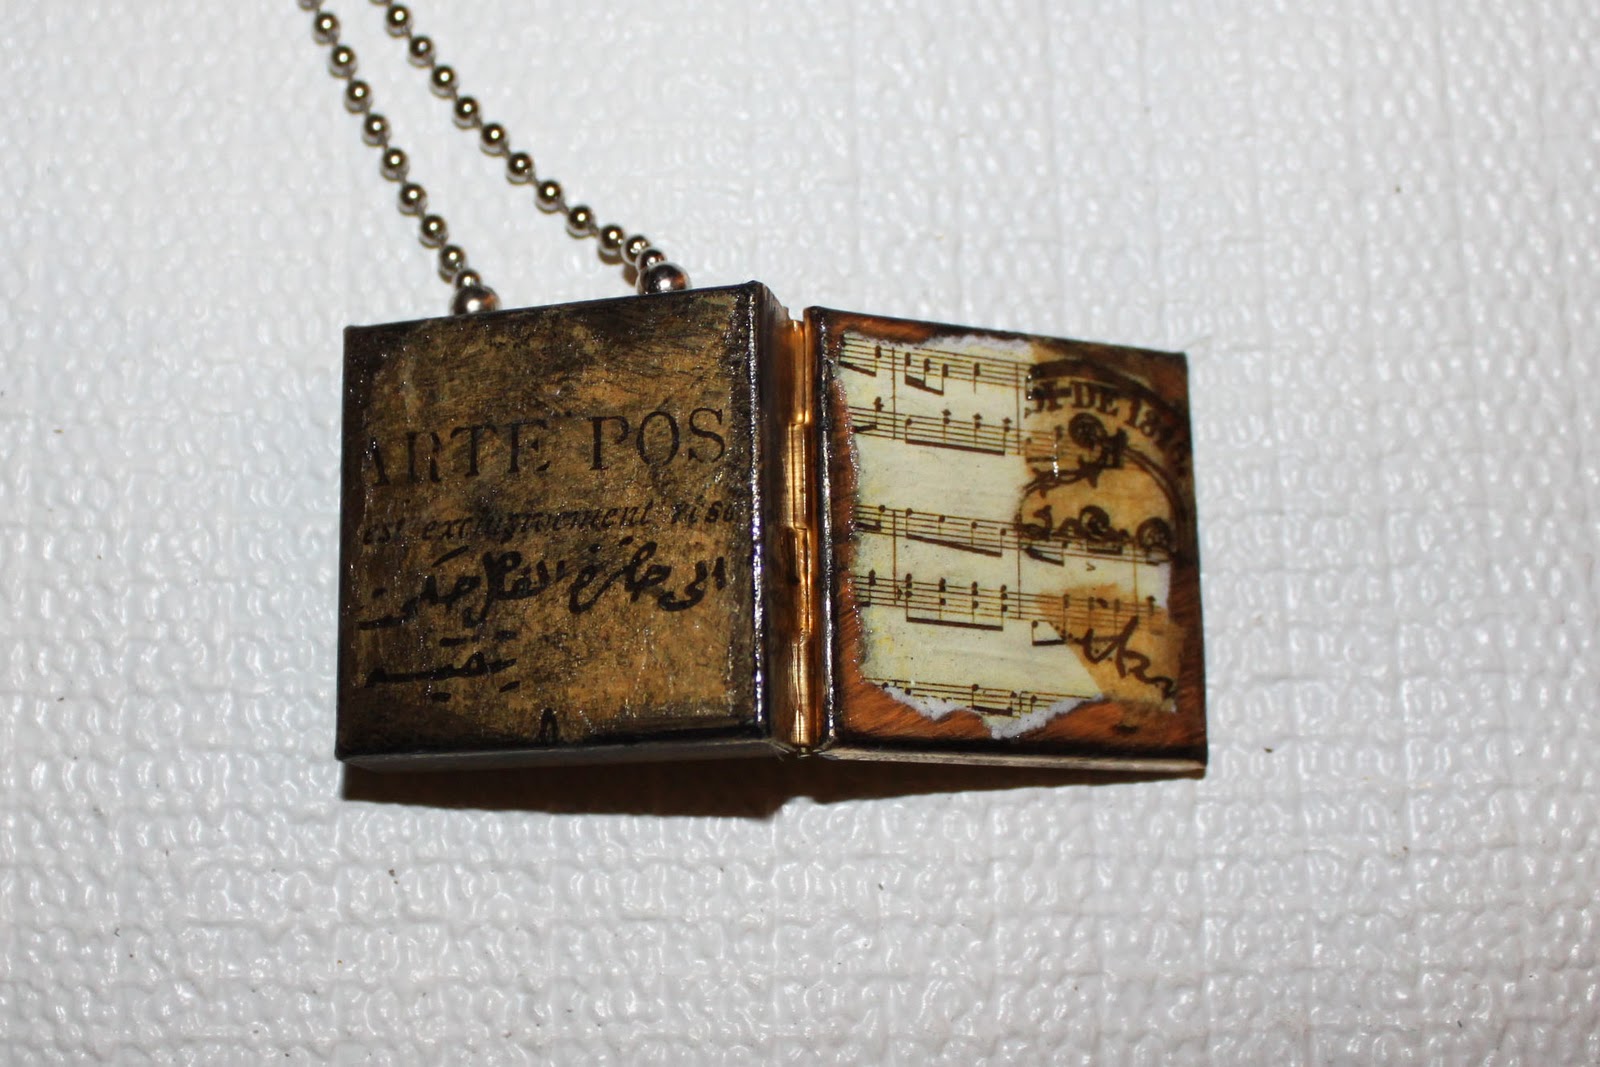
Here you can see the front and back.
.................................................

I wanted a more aged look so using my finger I added Patina Gilders Paste with a focus on the edges and a bit of Inca Gold Gilders Paste for some shimmer. Add a final thin layer of Diamond Glaze using your finger to seal.
.................................................
Finally using E6000 I attached a few embellishments. A Resin Octopus aged with Inca Gold Gilders Paste on one necklace. And on the other a plain Masonite Mini Gear and a Masonite Letter (.75" S) aged with Patina and Black Gilders Paste. I also did a light spray of Krylon Satin Acrylic Sealer on both necklaces front and back for added protection.
.................................................

The backs.
.................................................

Pop your mini journal and Mini Pencil inside your box and done!
I hope you enjoyed this tutorial and if you are interested I've put together a Mini Journal Necklace Kit. These make excellent gifts!

So cool.
ReplyDeleteThanks for the tutorial and step-out photos.
awesome~
ReplyDeletethanks so very much for this tutorial~
wow! this is fabulous. thanks for sharing the step by step directions.
ReplyDeleteThis is GREAT!! I love it :)
ReplyDeletefabulous!
ReplyDeleteSerious? Seriously!!! This is amazing! What could be more enchanting than a little book to wear around your neck! The tutorial is fabulous too..gave me some new ideas I definately want to try!
ReplyDeleteLove this! Thanks for sharing all the steps.
ReplyDeleteWhat a treat...am a total fan of journals...
ReplyDeleteThanks for posting this tutorial and all the pictures. I know I will enjoy making these necklaces.
ReplyDelete