Happy Friday! We have some fantastic NEW goods in the shop for you! What you see above plus many many more!
I know you are loving our Mini House Shrine Kits, and I thought why not merge them with our Hutch Shrine Kits? And voila!
I was simply over the moon excited to play with our new Moon Shrine Kit!
Supplies: Moon Shrine
Kit, Owl Paper
Cuts, Theatre
Character Stand, Art
Deco 2 Step Crackle, Gothic
Fence Cut Out, Star
Cut Outs, 10mm
Pink Mushrooms, Star Face
Bead, Prima
Genie Stone, 7mm
Jump Rings
I found the Theatre Character Stands very handy to add my owl. I simply painted one the same color as my shrine and glued in my Owl Paper Cut! (my glue was still wet in the photo but dried clear. I'm sure you were worried. lol)
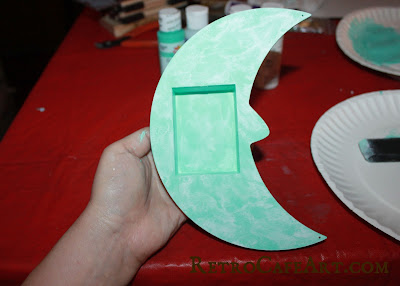
I was really happy with the way my background turned out. First I painted the whole thing aqua with acrylic paint. Then I dry brushed some white paint over the aqua in certain areas. Already looks very moon like! Next it was time for the crackle. I ADORE the Deco Arts Two Step Crackle. It's very easy to use. Simply follow the instructions on the bottles. The crackle you get will be clear, so the under color shows through. To highlight the cracks I simply brushed on some brown acrylic paint and then with a semi-moist paper towel rubbed it off so the paint would remain in just the cracks! Other colors such as gold, silver, or black would look cool in the cracks as well.
It was fun adding a charm dangle and some fibers. Not something I get to do often.
Here is a close-up of the crackle. Yummy right?
"Shoot for the moon and if you miss you will still be among the stars." - Les Brown
"Shoot for the moon and if you miss you will still be among the stars." - Les Brown
I also had a blast playing with our new Star Shrine Kit!
Supplies: Star Shrine
Kit, Ballerina,
Frosted
Optical Lense, White
Paper Roses, Night Sky
Star Stencil, Pink
Viva Pearl Pen
For this shrine I stared by covering the whole thing with decorative papers. I stamped the inside (before assembling the pieces) and then dry brushed some white acrylic paint here and there. I stenciled on some stars and then attached my bits to the inside. To give the crown a lovely chippy look, I painted it and then sanded it in certain areas to reveal the dark masonite underneath. Finally I tried out the new Viva Pearl Pens. I must say they were super easy to used and I loved the results! They also dried really quickly!
There are plenty of other New Goodies in the shop too!
I'm also extremely excited to welcome the talented Amy Nieman to the Retro Cafe Art Gallery Design Team! Amy created this postcard using Collage Sheet DP267. Don't you just love her fun, colorful work? We sure do and you can look forward to lots more. Welcome Amy! xo


