Saturday, May 10, 2014

Mermaid Art Dolls + a NEW ART SWAP‏


New Goodies!

Happy Saturday everyone!
This past week has been nice and toasty in Indiana. The days are getting longer, the nights are getting warmer, and my craving for ice cream is getting stronger! (It's entirely possible I caved and had a Banana Split last week!) Summer is coming, and was the inspiration for this week's goodies and Summer ART SWAP! We've got fabulous Articulated Merfolk and lots of goodies to go along with them!


New ART SWAP!

I'm so excited that we'll be swapping Merfolk! That's right, we are including the guys this time around. A fun challenge for some of us. So often the poor guys get neglected! You have plenty of time (over 2 months) to get your swaps to us, so jump on in! The water is mighty fine indeed! Oh, and I put the folks on sale in honor of the swap!


Art Time with Mr. Crabby and Mrs. Angel! 
 
If you notice, my sweet mergal is holding an Angel Fish, and Mr. merman is holding a crab, hence the names above! But to be quite honest, in our household it's more likely to be the other way around :). Like I said in the listing, I really want to make an ATC or Collage with the new crabs... "No art time makes me crabby." I think the crabs are my favorite new thing, aside from the Merfolk. And yes, you can have crabs too. Never thought I would say that in a newsletter! Lol!


I started my Merfolk by spray painting all of the pieces gold. This was great because it sort of looked like sand! Spray paint on the chipboard dried ridiculously fast, which was an added bonus.


And then blended them with my waterbrush. I love the difference that just a little bit of water can make. If needed blot the excess with a paper towel. I was going for an Oceany watercolor look.


For some fun and added texture, I added some accents with my White Sharpie.


Once my book pages were dry, I attached them to my pieces with Glue N Seal. I used my pieces to trace around the paper, then cut, sanded, and inked the edges. For my guy, I wanted him to have a vintage swimsuit look, so I painted on the suit with Sharpies. Red would have looked great too!


I finished them off with some embellishments and of course Stickles! The crab (love those crabs!) looks awesome with just a touch of red acrylic paint and my other favorite, the Sand Dollars, just a swipe of white paint. I used paint from my Sharpie Marker because I was lazy. The Sand Dollars were sort of fun to design, because I was forced to do something asymmetrical and more organic. I loved the way they turned out.


Inspiration By Tracy Delisle!

Several of you know Tracy Delisle, and this week was her birthday! HAPPY BIRTHDAY TRACY! She has been creating some amazing shrines lately, and this Moon Shrine is definitely among my favorites! She also Used Our Star Cut-Outs, Prima Genie Stone, and Rusty Stars. This Shrine always reminds me of one of my favorite quotes.

"Shoot for the moon. Even if you miss, you'll land among the stars."    
     - Norman Vincent Peale


Inspiration By Gerri Herbst!

This FUN Circus Collage by Design Team Member Gerri Herbst makes my heart happy! It definitely captures all things Circus and has a ton of movement! Gerri used our Circus Paper Cuts, Collage Sheet CV5 (background tent), ATC Chipboard Circus Tent, Muscle Man Cut-Outs, ATC Circus Flag Cut-Outs, and Stickles. Love!


Inspiration By Linda Cain!

This super COOL Bust Stand Up is by Design Team Member Linda Cain! The Gear Wheels are the perfect touch, and you can find even more great photos on Linda's blog. As Linda notes, this would make a great Father's Day gift! Fantastic!


Inspiration By Kim Collister!

And to put you back in the doll making mood, what could be better than an Santos Frida! This stunner was created by the talented Kim Collister using the Medium Santos Doll Kit, Frida Head, Flaming Heart Trinket, Artist Pallette, and more! She's beautiful Kim!


Happy Mother's Day!

Whether you have children or fur babies. Whether you are a mother or are celebrating a beautiful mother, I hope you get to do something you love this weekend. And if it's taking some time to create some art, enjoy every second!
xoxo

Monday, May 5, 2014

Tea Cup Fairy Art Dolls + a FREE GIFT


New Goodies!

Happy Saturday everyone! Last week we finished watching the last few episodes of Downton Abbey. JUST finished? I know, I know, but we had a late start on the series! This got me thinking about tea, lots of tea! Which led to "Lemon", "Sugar", and "Honey", three sweet Tea Cup Fairies! They are super sweet, and the perfect addition to our extensive Art Doll Kit section! There are other new tea related goodies in the shop too, and we are super excited to have several pieces from "The Sweet Life" collection by Everyday is a Holiday in the shop as well!


Art Time and Tea! 
 
I'm in love with our new Tea Cup Fairies and as much as I would have LOVED to play with all three, I settled for Lemon. Keep in mind, these gals can also be coffee fairies, hot cocoa fairies, etc. I'm drinking a Chai Latte as I type. What's in your cup?


I started my fairy by painting her entire body with black acrylic paint.


Using my stencil and white sharpie, I doodled in my design.


The white pen with the black paint really looked like writing on a chalkboard. Come to think of it, you COULD paint these gals with Chalkboard Paint. And then doodle on them with chalk!
I loved the look of the stenciling so much, that I kept on doodling. This was not AT ALL what I had planned for my gal, but I felt the need to continue doodling and who am I to argue. Sometimes the hand wants what the hand wants!


I finished her off with some paper cuts (Fairy Doll Head and Alice in Wonderland), a piece of Cutlery Cut Out painted silver, and some sweet words in the label frame. Collage Sheet DP65 was beyond perfect (MAGIC TEA!). I also filled the frame with Clear UTEE for that cool resin effect!


Inspiration By Heather Robinson!

I'm loving this Bird Cage Doll by Heather Robinson! Heather just starting making dolls, and as you can see, she is quite the natural!


Inspiration By Diana Darden!

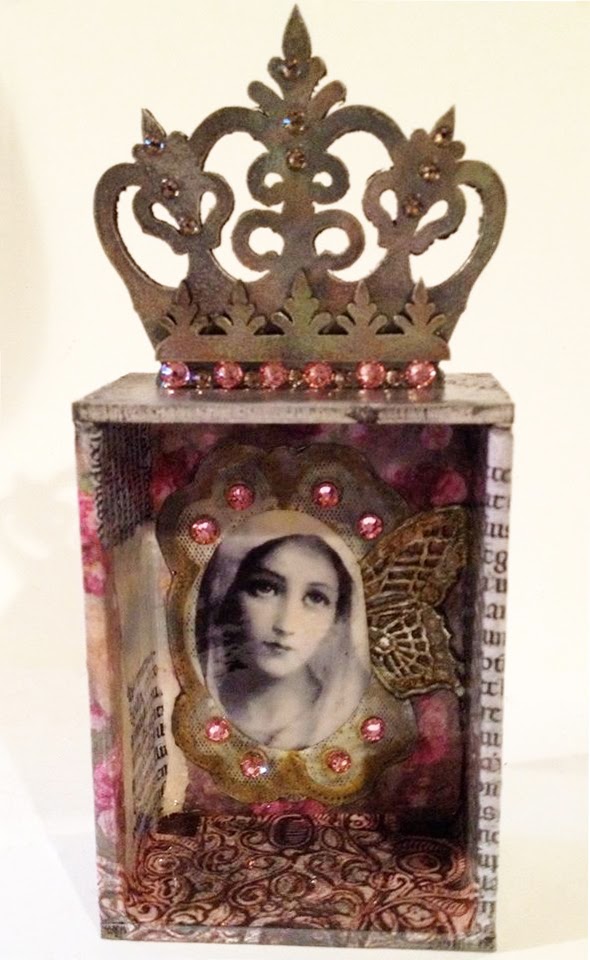
This amazing Crown Shrine is by Diana Darden. Diana's piece has already sold (not surprisingly), however you can find more in Diana's Etsy Shop!


Inspiration By Diana Darden!

This amazing Crown Shrine is by Diana Darden. Diana's piece has already sold (not surprisingly), however you can find more in Diana's Etsy Shop!


Inspiration By Luci Brito!

This stunning piece of art is by Luci Brito. Luci used the Basic Mini DOTD Shrine Kit for the top of her box, combined with her magical handmade pieces. This amazing piece of art showed up randomly on my doorstep, and I was in awe. Luci is as generous as she is talented!!!


A FREE Digital Collage Sheet for YOU!

And now it's time to share the love with YOU! You can download this FREE NEW Digital Collage Sheet HERE on our site. Thank you for your continued support - from the bottom of my heart!

"Art washes away from the soul the dust of everyday life."  
      - Pablo Picasso

Saturday, April 26, 2014

Queen Bee Doll Kits and other Buzz Worthy Goodies‏


New Goodies!

Happy Saturday everyone! The weather around here has been BEE-u-tiful and now I'm dreaming of summer! As soon as I typed "Queen Bee" in last week's newsletter I knew what I had to do next. I'm sure those of you that follow me had an idea too! QUEEN BEE DOLLS! Yep, and she's sweeter than honey if I do say so myself! The perfect addition to our extensive Art Doll Kit section! We also have new Tim Holtz Stencils, More Gilded Life Bezels, and a few other goodies to pollinate your creativity!


Art Time in my Hive! 
 
I had an absolute blast with miss Queen B.
Warning, this Newsletter may contain a copious amount of bee-related word plays! One of my favorite customers sent me lists and lists of them, some of which I will share with you below. But back to the art. I'll share a few tips with you.
Bee Calm and Art On!


I started Miss B. by painting her entire body with gold acrylic paint. I wanted to stencil her back, so I used our new Small Honeycomb Stencil. TIP: These stencils work more like masks, so you have to plan your colors ahead of time. I wanted the inside of the cells black and the borders gold, so I painted the body in gold and stenciled the cells in black. Or you can do the reverse!


The best thing about this new stencil is that the pattern is repeating. Stencil not long enough, no problem.


After you have stenciled to the bottom simply lift up the stencil and line the top row up with your last row of paint and continue! You can do the same for the sides. So this stencil can cover any piece, no matter how large! It also looks great when you just stencil small parts here and there!


Her "skirt" is especially great because depending on how you alter, it can look like a beehive OR a bee body! Or a little bit of both like in the art sample. The top layer of her "skirt" comes in pieces, so you can alter each segment separately, making altering a snap. I love how I was really able to ink up the edges of each piece. Really added a lot of dimension! I had fun picking two papers that were vintage, yet had the obligatory yellow and black. Sort of a modern interpretation. 


I wanted lots of texture on the wings, and I wanted them to resemble veins, like you would see on insect wings. First I painted my wings black to add contrast then I attached my lace with Glue N Seal added liberally. Once dry, I trimmed and inked my edges. You could also use Cheese Cloth for this! Just Bee sure to pull it apart a bit. 


Finally I attached some embellishments and set her in the optional Honeycomb Stand! It's like a little bee docking station. You can remove her as you wish! I especially love the look of our new Chipboard  Honeycomb Bits. Handy little things that you can used just about anywhere. You can cut the pieces apart as needed too. 


These gals will get your wings a-buzzing! And if you're not sure where to start, just 'Wing It!'
Don't worry bee happy!
I just realized that our New Honeycomb ATC Door Shrine Kit would make a great Wardrobe Closet for your new Queens! 


As I mentioned earlier, one of my customers had fun sending me clever "Bee" word plays, some of which are probably above! She prefers to remain anonymous, but she knows who she is. Here are a few of my favorites that I thought I would share. Courtesy of Queenteena.

"Honey, BEE sure to COMB your hair!!"
"Hive been busier than a bee!"
"Hive More BEEs for You, so You Can BEE More!!!"
"Easy-Beezy!"
"Bee UTEE!"
"Do you have a bee in your bonnet to try out ..."
"BEEmail me"
"To Bee or not to Bee"
"Easy as A, BEE, C!"
"Bee Adorned and You'll Bee Adored!"  
  "Let your Inner Nectar SHINE!"
"Just Bee!!"
"Show your Inner Queen BEE"

And those are just a few from the emails that kept me entertained all week! Hope they made you smile too! 'Pure Gold'


Inspiration By Danene Grillo!

I just love this awesome mixed media canvas by Danene Grillo! Hard to believe she did the entire piece using just one of our stencils, Bus Stop Mania! Lot of great twists and turns of the stencil for sure. Danene just started her first blog, so be sure to stop by and say hi! Danene is very talented so you are sure to see lots of great art pop up there. Thank you Danene!


Inspiration By Terri Kahrs!

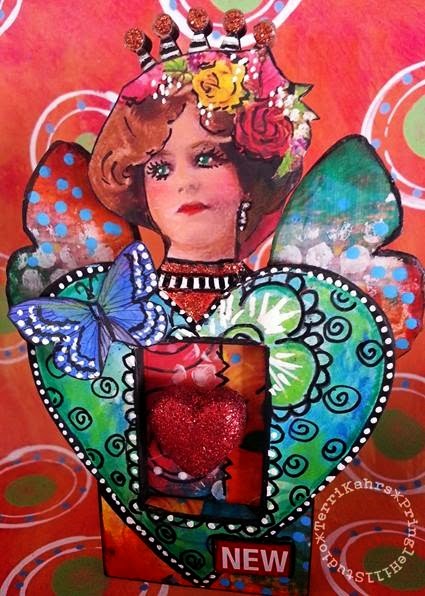
Could this Sweetheart Fairy be anymore gorgeous and colorful? She was created by the talented Terri Kahrs! I adore Terri's bright and happy style. Just scrolling through her blog makes me happier! Thank you Terri!


Inspiration By Lynn Stevens!

Design Team Member Lynn Stevens created this awesome Mini Santos Doll. Lynn also used our Mini Doll Head Paper Cuts, Small Wheel Set, Wing Collage Sheet, Bird Cage, Nest Charm, Bird Word Paper Cuts, and Gear Cut-Outs. I'm not sure how I lived life before seeing a Frida Santos on wheels! SO creative Lynn! I heart her so much!


Inspiration By Linda Cain!

This super cool Tower Shrine is by Design Team Member Linda Cain! I adore how she painted and placed the Letterpress Blocks and OH MY that roof! Can you guess what she used? Our Small Stencil Board Strips. How brilliant is THAT! They certainly aren't just for stenciling! 
You can see more amazing step-out photo and instructions on Linda's blog here.